Getting a new gaming monitor home is the easy part. Getting it to actually perform the way it should is where most people fall short. A high refresh rate panel plugged in with the wrong cable, or left sitting on its default resolution, will never show you what it is really capable of. This guide walks through the entire process of how to set up a gaming monitor, from the moment you take it out of the box to the last driver update, so nothing gets left running on autopilot.
Whether you just bought your first 144Hz screen or you are moving up to a 4K panel with HDR, the steps below cover the hardware, the cables, and every setting worth touching in Windows. By the end you should know exactly how to set up a gaming monitor for the smoothest, sharpest picture your hardware is actually able to produce.
Why Setting Up Your Monitor Properly Matters
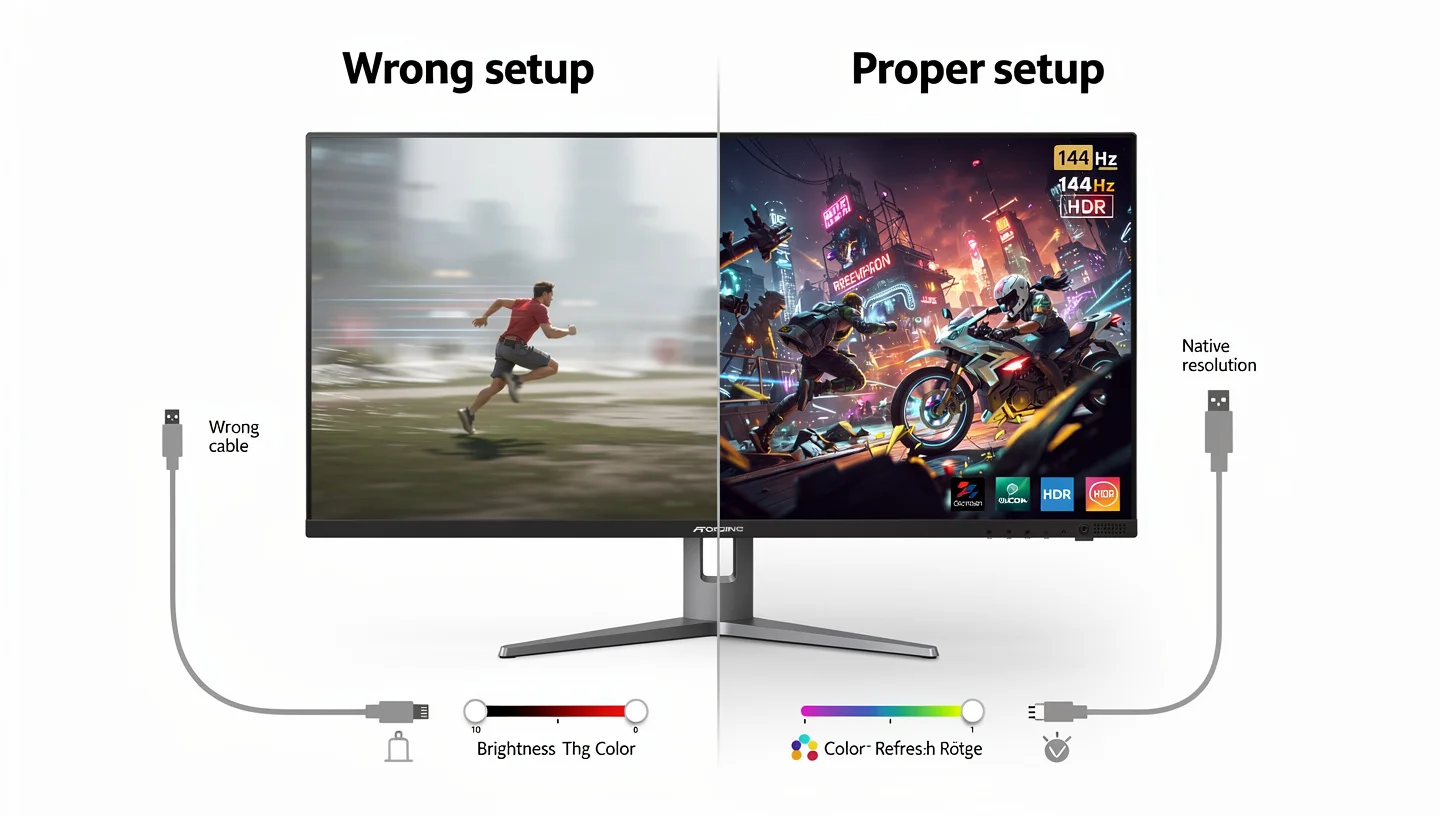
A lot of gaming PC upgrades work the moment you plug them in. A new graphics card raises your frame rate on its own, more memory shows up the second Windows boots, and a faster processor just runs faster. A monitor does not work that way. Even a top shelf panel with a fast refresh rate, wide colour coverage and HDR support will sit there doing none of it if the cable is wrong, the resolution is off, or half the features are still switched off in the menu. Every setting below exists because manufacturers ship monitors in a fairly conservative default state, and it is on you to turn the rest on.
Quick Steps
- Assemble the panel, stand and base, then position the monitor at eye level
- Connect the monitor using HDMI or DisplayPort
- Plug the cable into the graphics card, not the motherboard
- Tweak Game Mode, brightness, contrast and gamma in the monitor’s own OSD
- Set the native resolution and highest available refresh rate
- Turn on G-Sync or FreeSync if your monitor supports it
- Enable HDR and adjust colour depth
- Update your graphics card and monitor drivers
Tools and Requirements
Most gaming monitors need almost nothing to assemble. A Phillips screwdriver is worth keeping nearby in case the stand uses screws instead of clips, but the rest of the process is tool free. You will also need an HDMI or DisplayPort cable, a graphics card with a free output, and a few minutes inside your Windows display settings. If you have not picked a monitor yet, it helps to read through how to choose a gaming monitor before spending money on a panel that does not actually match the rest of your PC.
How to Set Up a Gaming Monitor Step by Step
Assemble Your Monitor
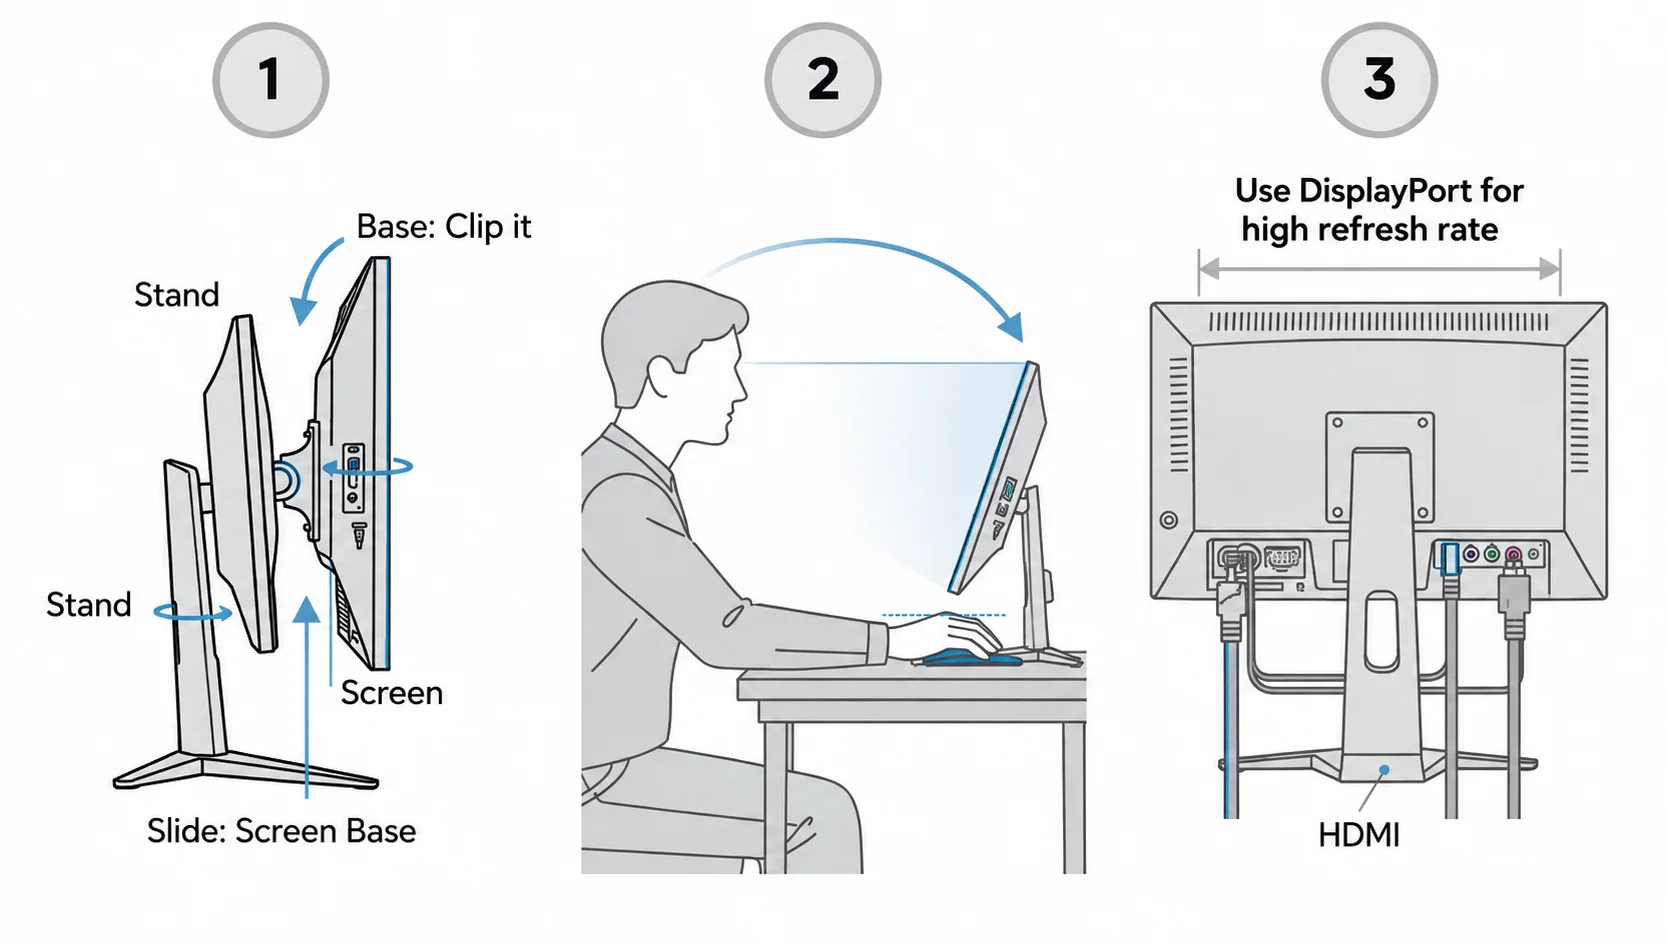
A standard gaming monitor comes in three pieces: the panel, the stand, and the base. Clip the stand into the base first, usually with a thumb screw, then slide the panel onto the stand until it clicks into place. Some monitors skip screws entirely and rely on snap fittings, while others need a couple of turns with a screwdriver to lock everything down properly. Once it is together, place it on your desk before you touch any cables, and check that the base sits flat so the whole thing does not wobble once you start adjusting the height later on.
Position Your Monitor Correctly
Before you plug anything in, get the physical position right. The top edge of the screen should sit at or just below eye level, and you want roughly an arm’s length of distance between your face and the panel, or about one and a half times the diagonal size of the screen. Tilt the monitor back slightly so you are looking down a little rather than straight ahead, which keeps your neck relaxed during long sessions. Most stands allow height, tilt and swivel adjustments, so take the time to dial these in rather than leaving the monitor at whatever angle it arrived in.
If the built in stand cannot reach a comfortable height on your desk, a separate monitor arm gives you far more range and usually frees up desk space at the same time. Room lighting plays a bigger role than most people expect too, since a bright monitor in a dark room or a dim screen under harsh overhead light both strain your eyes far faster than a screen that roughly matches the brightness of the space around it, so it is worth adjusting either the monitor or the room lighting to bring the two closer together.
Check Your Connections: HDMI vs DisplayPort
Before anything else gets plugged in, look at what cable your monitor actually needs. If you own a high refresh rate or 4K panel, an old HDMI cable or an outdated port will hold you back no matter how good the screen is. Both HDMI and DisplayPort will get an image on screen, but DisplayPort generally offers higher bandwidth and is built specifically with monitors in mind, so pick that over HDMI when your monitor and graphics card both support it. The table below gives a rough idea of what each connector handles at maximum spec, which is useful when you are trying to work out why a cable will not push the refresh rate you expected.
| Connector | Typical Max Bandwidth | Best For |
|---|---|---|
| HDMI 2.0 | 4K at 60Hz | Consoles, budget monitors |
| HDMI 2.1 | 4K at 120Hz | Consoles, high end monitors |
| DisplayPort 1.4 | 4K at 144Hz or higher with compression | PC gaming monitors |
| DisplayPort 2.1 | 4K at 240Hz and beyond | High refresh rate PC monitors |
The official DisplayPort site maintained by VESA has the full technical specification if you want the exact numbers behind each version. Anyone connecting a screen for the first time should also check our full breakdown on how to connect a gaming monitor to a PC, which covers every port type you are likely to run into, including older DVI and VGA connections on budget builds.
Connect the Cable to Your Graphics Card, Not the Motherboard
This is the step people get wrong most often. Your cable needs to go into the port on your graphics card, not the one built into your motherboard. Plugging into the motherboard port means your PC renders everything using integrated graphics instead of your discrete card, which quietly tanks your frame rate with no obvious warning that anything is wrong.
Look toward the bottom of your PC case for a horizontal slot, that is almost always the graphics card. The vertical slot higher up on the case is the motherboard output, and it should only be used if your PC has no dedicated graphics card at all. If you are unsure which slot is which, most graphics cards also have their brand name printed near the ports, which makes the correct slot easy to confirm at a glance.
Tweak Your Monitor’s On-Screen Menu
Before touching anything in Windows, open your monitor’s own on screen display, usually reached through a set of buttons or a small joystick on the back or underside of the panel. This is where Game Mode lives on most monitors, along with an optional crosshair overlay and an on screen FPS counter that a lot of players leave switched off without realising it is there.
Brightness, contrast and gamma are also set from this menu rather than through Windows, and getting these right matters more than people expect, since a panel left on factory settings often looks either too dim or slightly washed out compared to how it should look once calibrated. Colour accuracy out of the box also depends heavily on the panel type inside the screen, and it is worth reading up on the differences between an IPS panel and other panel technologies if colours still look off after adjusting these menu settings manually.
Set Your Resolution and Refresh Rate in Windows 11
With the monitor plugged in, it is time to move into Windows. Right click your desktop, choose Display Settings, then scroll down to Scale and Layout and open Display Resolution. Select your monitor’s native resolution here, since running anything lower will leave the image looking soft no matter how sharp the panel actually is.
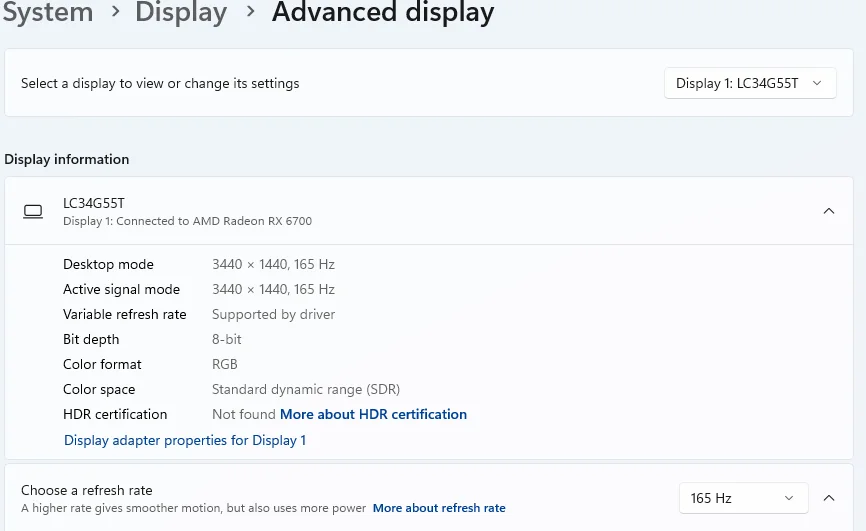
Next, open Advanced Display Settings from the same page and look for the refresh rate dropdown. Choose the highest number listed, whether that is 144Hz, 240Hz or higher, and Windows will apply it immediately without needing a restart. If your dropdown is capped lower than what the box promised, that usually points to a cable or driver issue rather than a faulty screen, so it is worth reading up on whether 120Hz is enough for gaming to understand what kind of difference these numbers actually make once you are in a match.
Most gaming monitors sold today land on one of three common resolutions: 1080p, 1440p, or 4K. 1080p remains the easiest to run at high frame rates on modest hardware, 1440p sits in the middle and has become the default choice for a lot of mid range builds, and 4K demands the most from a graphics card but rewards you with the sharpest possible image on a large screen. None of that matters if the resolution in Windows does not match what the panel is actually built for, so it is worth double checking this setting even if the monitor appeared to work correctly the moment it was plugged in.
Enable VRR: G-Sync or FreeSync
Variable refresh rate technology matches your monitor’s refresh rate to whatever frame rate your graphics card is putting out at that moment, which cuts down on screen tearing and stuttering during fast motion. Screen tearing shows up as a visible horizontal split in the image whenever the frame rate and refresh rate fall out of sync, and it tends to get worse the faster you turn the camera, which makes it especially noticeable in competitive shooters and racing games.

Enabling VRR removes almost all of it without costing any frame rate in exchange, which is rare for a setting that improves visual smoothness this much for free. If you have an Nvidia card, right click the desktop, open Nvidia Control Panel, then Set Up G-Sync and tick the box to enable it for your display, making sure the correct monitor is selected from the dropdown before applying the change.
Nvidia keeps a full list of certified G-Sync monitors on its own site if you want to check whether a specific model has been officially tested and approved for the feature. This single setting is one of the more noticeable upgrades on this entire list, since tearing tends to show up constantly during quick camera movement and once it is gone it is hard to go back to playing without it. AMD users have a similar path available to them, just through a different piece of software with its own naming for the same underlying feature.
To turn it on with an AMD card, right click the desktop, choose AMD Radeon Software, head into Display, and switch FreeSync on there. Both features do the same job under different names, and most modern monitors support one or the other, sometimes both at once depending on the panel. Cheaper monitors sometimes only support VRR across a narrow range of frame rates, so if tearing still shows up after enabling it, check the specification sheet for the exact Hz range the feature actually covers on your specific model.
Adjust HDR and Color Settings
Once refresh rate and VRR are sorted, HDR is the next setting worth checking. On Windows 11, press the Windows key plus Alt plus B to toggle it on quickly, or go through Display Settings, select your monitor, and switch on Use HDR manually from there. Keep in mind HDR also needs to be turned on inside the game itself, and not every title supports it, so check before assuming something is broken on the hardware side. For colour depth, Nvidia users should open Nvidia Control Panel, go to Change Resolution, and pick the highest colour setting available under Apply the Following Settings.
AMD owners will find the same option inside AMD Radeon Software under the Display tab. Our full explanation of HDR covers why the picture can sometimes look washed out right after enabling it, and how to fix that without turning the feature back off entirely.
Update Your Monitor and Graphics Card Drivers
The last step is one people skip, and it is often the reason a setting refuses to show up at all. Visit your graphics card manufacturer’s website and grab the latest driver, since older drivers sometimes hide refresh rates or VRR options that the monitor fully supports but Windows cannot see yet. It is also worth checking your monitor manufacturer’s site for firmware updates, particularly if you are chasing an overclocked refresh rate the panel does not expose by default out of the box. A five minute driver check can solve problems that look exactly like a defective monitor but are really just outdated software sitting in the background.
How to Set Up a Gaming Monitor for PS5 and Xbox
Connecting a console works a little differently since there is no graphics card slot to worry about, just a single HDMI port doing all the work. Use the cable that shipped in the box, since both PS5 and Xbox include an HDMI 2.1 cable capable of 4K at 120Hz without needing to buy anything extra. On PS5, go to Settings, then Screen and Video, then Video Output, and open the Information screen to confirm what resolution, VRR and HDR the console has actually detected on that port. Xbox owners should head into Settings, General, then TV and Display Options to check the same details under video modes, since the wording differs slightly between the two systems even though the underlying process is nearly identical.

Leave resolution on Automatic at first, then manually enable 120Hz, VRR and HDR only once the information screen confirms your monitor actually supports them on that specific HDMI input, since some monitors handle different ports differently and one socket can silently cap out lower than the others. If the picture still looks off after all three are switched on, try the other HDMI port on the monitor before assuming the cable or console is at fault, since budget panels sometimes route full bandwidth to only one input.
How to Set Up Dual or Multiple Monitors for Gaming
A second screen is useful for chat, Discord, or simply keeping an eye on stats while you play without alt tabbing out of a match. Plug the additional monitor into any free port on your graphics card, then right click the desktop and open Display Settings again. Under Multiple Displays, you can drag the monitor icons around to match how they physically sit on your desk, which keeps your mouse movement feeling natural as it crosses between screens instead of jumping to an unexpected spot.
Pick which one should be your main display by selecting it and ticking Make This My Main Display, since games will default to whichever monitor holds that setting whenever they launch. If the two screens are different sizes or resolutions, a bit of bezel correction or resolution scaling inside your game’s graphics menu will smooth out any visible mismatch between them. A lot of streamers turn the second monitor to portrait orientation for this exact reason, since chat and other text heavy windows fit a tall narrow screen far better than a wide one.
If your graphics card runs out of ports before your monitors do, a docking station or a simple adapter can add the extra connections without needing a second card. Try to keep brightness, contrast and colour settings reasonably close across both screens too, since a mismatch is far more distracting once you are glancing between them constantly during a match. It also helps to trim down taskbar clutter across both displays, since a cleaner desktop keeps your attention on the game rather than on notification icons drifting into view from the corner of your eye.
Extra Gaming Monitor Settings Worth Knowing
Beyond the basics, most gaming monitors hide a handful of extra features inside their on screen menu that rarely get touched after the first setup. Aim stabilizer corrects and smooths out motion blur, which matters most in fast first person shooters where recoil and quick turns cause the image to smear across the screen. Black equalizer brightens shadowed areas of the screen without blowing out the highlights, which is useful for spotting enemies hiding in dark corners without cranking the overall brightness up too high.
A KVM switch, originally built for managing multiple computers from one keyboard and mouse, now shows up on plenty of gaming monitors and lets you swap between a PC and a laptop without unplugging anything at all. It is also worth checking your panel’s response time setting inside the OSD, since a slower option here can introduce visible smearing even after every other setting on this list has been dialled in correctly.
Once everything is running, spend a few minutes on cable management too, since a cleaner desk is not just about looks, tangled cables snagged during a fast mouse swipe can pull a plug loose at the worst possible moment. If your monitor has RGB lighting, most brands let you sync it with the rest of your setup through their own software, such as Aura Sync on ASUS gear, so your case, keyboard and monitor can all run the same colour pattern instead of clashing. For a more technical check, some monitors let you plug a mouse and keyboard directly into a USB port on the panel itself, which measures the actual button to pixel delay of your whole setup rather than relying on a spec sheet number that may not reflect reality.
The table below sums up what each of these extra features actually does, since the naming varies quite a bit between monitor brands.
| Feature | What It Does | Best For |
|---|---|---|
| Aim Stabilizer | Reduces motion blur during fast movement | First person shooters |
| Black Equalizer | Brightens dark areas without overexposing highlights | Horror games, dark maps |
| KVM Switch | Swaps keyboard and mouse control between two devices | PC and laptop users sharing one desk |
| Response Time Setting | Controls how fast pixels change colour | Reducing ghosting and smearing |
Final Thoughts
None of these steps take long individually, but skipping even one of them means leaving performance on the table after paying full price for a monitor built to deliver it. Once you know how to set up a gaming monitor properly, from the physical assembly through resolution, refresh rate, VRR and colour settings, the difference in motion clarity and overall sharpness is immediate. Go back through the on screen menu occasionally too, since firmware updates sometimes add new options that simply were not available when you first plugged everything in.
Frequently Asked Questions
Do I need any tools to set up a gaming monitor?
Most modern monitors need no tools at all, relying on clips and thumb screws to hold the stand and base together. A Phillips screwdriver is still worth having nearby, since some models use a couple of screws to secure the foot to the stand before it will sit steady on a desk.
What cable do I need for a gaming monitor, HDMI or DisplayPort?
Either will get an image on screen, but DisplayPort usually offers more bandwidth and better support for high refresh rates, so choose it when your monitor and graphics card both have the port available. HDMI is still a solid choice and remains the more common option on TVs and consoles.
How do I adjust settings on my gaming monitor?
Almost every monitor has a built in on screen display, accessed through buttons or a small joystick on the back or underside of the panel. From there you can adjust brightness, contrast, game modes and any extra features like aim stabilizer or black equalizer without touching Windows at all.
Is it worth enabling G-Sync or FreeSync?
Yes, if your monitor supports either one. Both reduce screen tearing and stuttering by matching your display’s refresh rate to your graphics card’s output, which makes fast motion look noticeably smoother during gameplay without any downside worth mentioning.
Can I use a gaming monitor with a PS5 or Xbox?
Yes, as long as the monitor has an HDMI port. For 4K at 120Hz you will need HDMI 2.1 on both the monitor and the cable, which both consoles include in the box by default.
How do I set my monitor as the primary display in Windows 11?
Open Display Settings, select the monitor you want under Multiple Displays, then tick the box labelled Make This My Main Display. Games and apps will open on that screen by default from then on, without needing to move them manually each time.
How long does setting up a gaming monitor actually take?
Physical assembly usually takes five to ten minutes, and running through every software setting covered above rarely takes longer than fifteen minutes once you know where each option lives. The whole process from unboxing to a fully configured screen fits comfortably inside half an hour.